Kudzu Game Engine
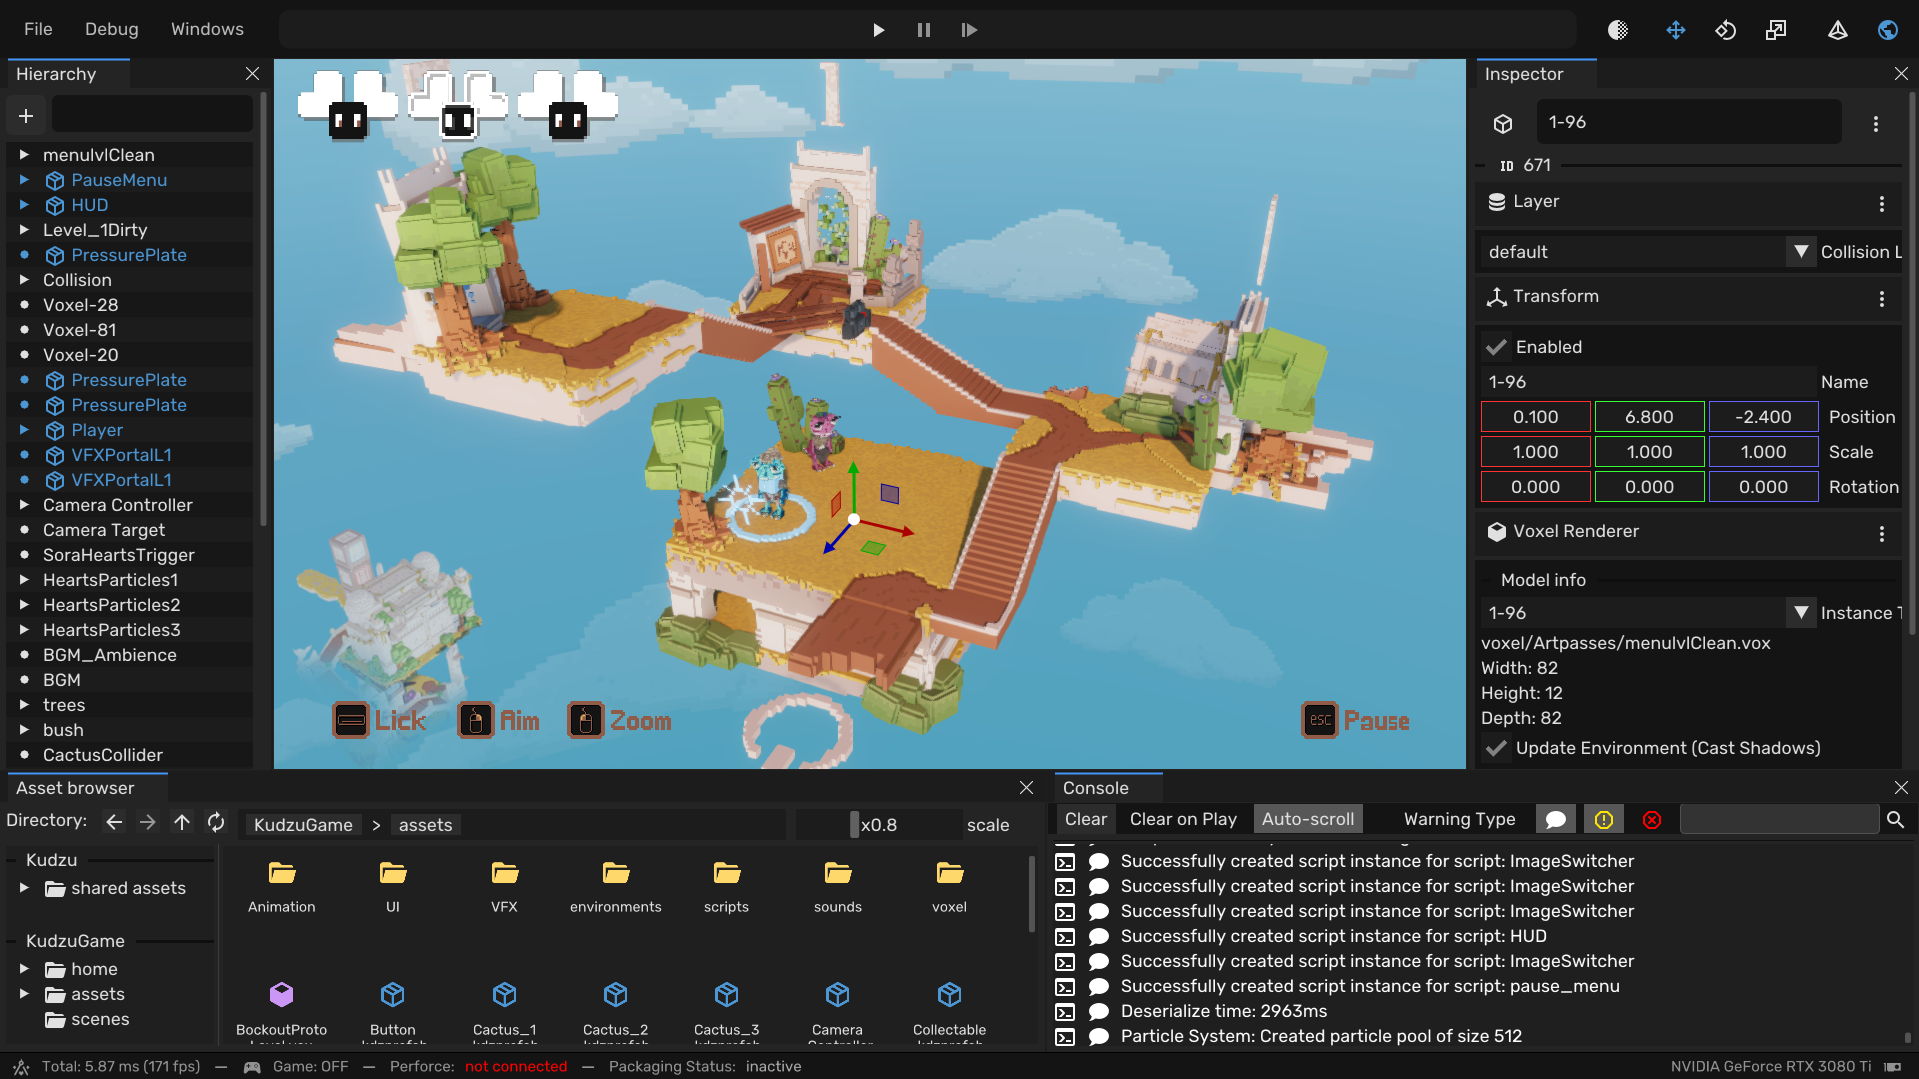
Screenshot of the engine (Click to enlarge)
The Kudzu Engine is a student project where, together with 15 teammates, we developed a game inside our custom game engine for both PS5 and PC. The project consisted of 2 parts.
| Pre-production | - 8 weeks to develop the engine | - Only Programmers |
| Production | - 8 weeks to make a game | - Programmers, Artists, and Designers |
The second stage, BLock D, we were allowed to take our engine with us and use it to make a game. We got 4 artists and 3 designers, and a couple gameplay programmers to help us make a game.
🎮 The Game
🛠 The Engine
My Contributions
- 📝 Scripting: A custom scripting language that allows for quick iterations of game logic. All gameplay logic is written in language.
- 📦 Prefabs / Serialization: Allowing users to make reusable objects that can be used in multiple scenes and be easily updated.
- 🏭 CI / CD: A Jenkins pipeline that will automatically "ship" the engine to the team whenever someone changes the engine code.
- 👥 User Experience: Making sure the editor is user-friendly and usable by artists, designers, and programmers. Focusing on their needs and feedback.
- 🏗️ Engine architecture: Designing the engine is such a way where it is easy to extend and maintain. Making sure the engine is scalable and can handle larger projects.
Below I will go over some of these features in more detail.
📝 Scripting
All gameplay logic is written in a custom scripting language. Gameplay programmers and designers to can write the gameplay code without having to recompile any C++ code. This allows for quick iterations and testing of game logic.
The scripting language give us a clear separation between the engine and the game logic. Additionally, it makes the engine "shippable", scripts are loaded at runtime. Anyone with the engine executable can write scripts and make a game with it. No need to have the engine source code or compile it.
Tweening code, move/rotate
Read More - Scripting (Expand)
Variable Inspector
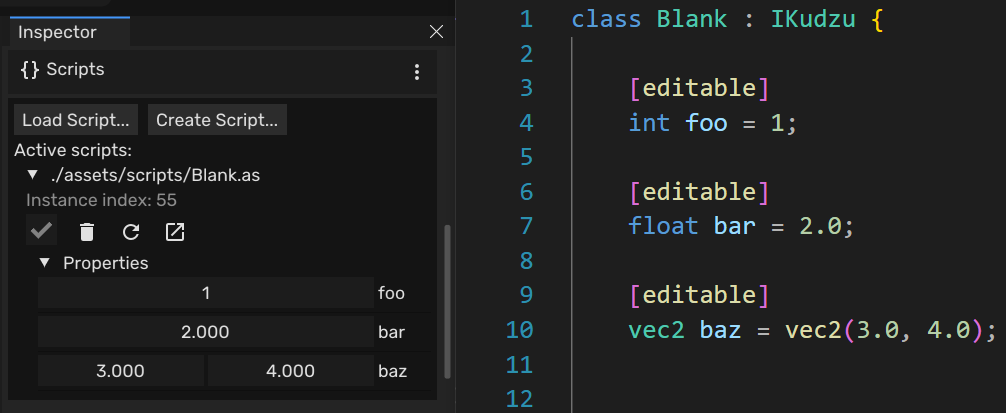
Variables visible in the inspector
Problem: Having to change the code every time you want to test something.
Solution: developed a way to change variables in the editor. You can mark a variable with [editable] and it would show up in the inspector.
Variable Serialization
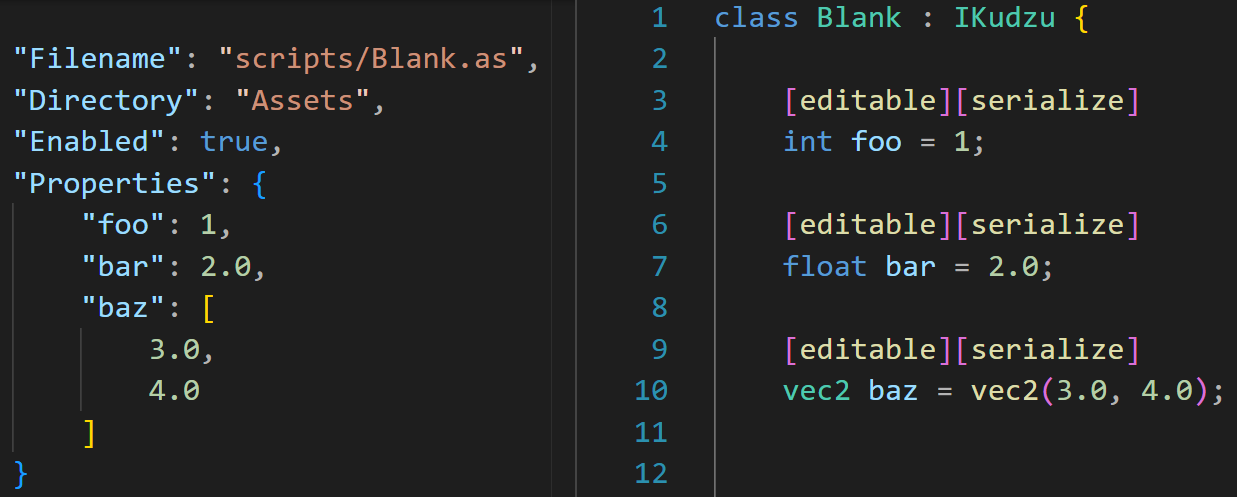
Variables serialized to a file
Problem: Changing variables in the editor is nice, but if you can't save them, it's useless.
Solution: I added a way to serialize the properties of a script. You just mark it with [serialize]. This would save the variables to a file and load them.
Structure
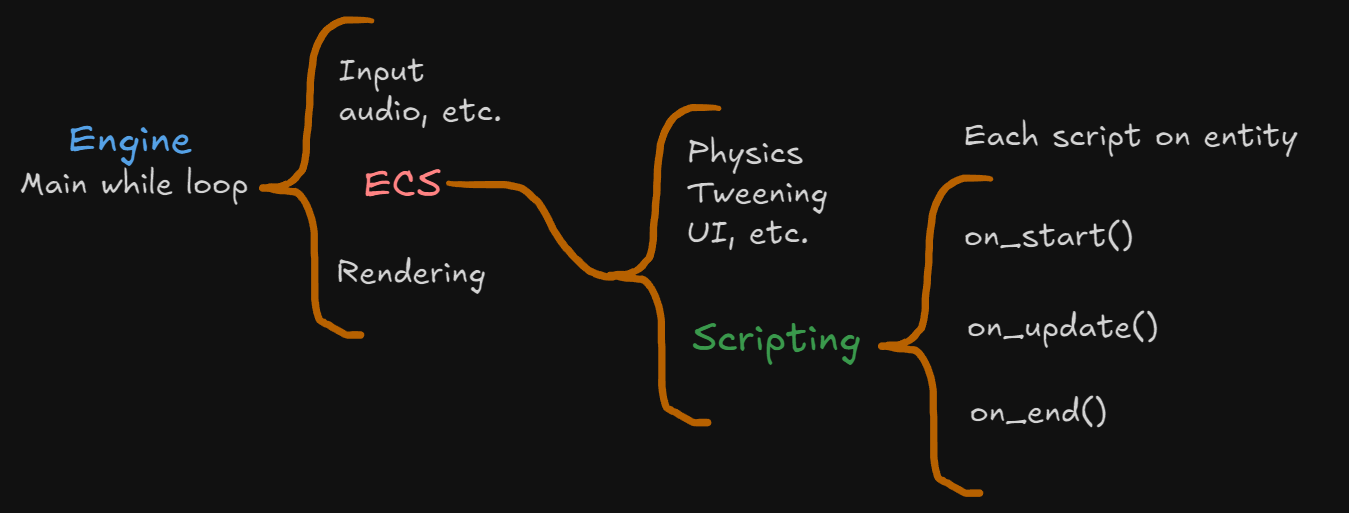
Structure of when scripts are called
Demos
All demos shown are made with the scripting language.
Engine Showcase Demo
📦 Prefabs / Serialization
Problem:
- Having to remake the same entity in every scene.
- Scene files get checked out / locked by one person (Perforce)
- Users need a way to work independently on their own features.
Solution:
Developed a prefab system that create a prefab file with entities and their components. Designers can drop the prefab into the scene and tweak the values. Whenever a programmer updates the prefab, those changes automatically propagate to every scene that uses the prefab.
Creating a Prefab and changing it
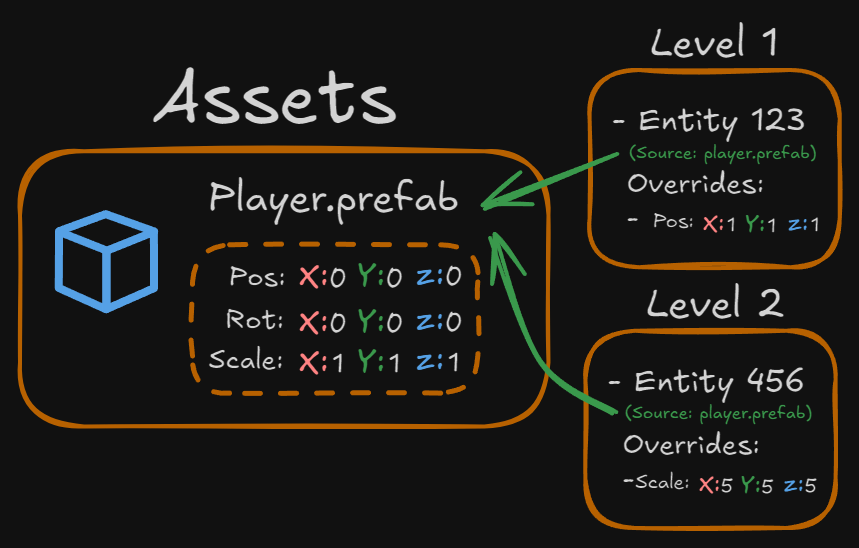
Prefab Structure - levels/scenes reference the prefab file.
Read More - Prefabs (Big Read)
Below is a highly-detailed explanation of how the Prefab system works.
Prefab Explained
With many more gameplay programmers now on the team, they need a way to work independently on their own features. Prefabs provide exactly that. A programmer creates a prefab, designers drop it into scenes and tweak its parameters, and then whenever the programmer updates the prefab, those changes automatically propagate to every scene that uses it.
This is a huge time save when we have multiple scenes, with multiple of the same prefab "entities". You only have to change the prefab once, and it updates everywhere.
How it works
We have 2 files.
- Scene
- This file contains all the entities in the scene with their components and properties.
- Prefab
- Is the same as a scene file. Entities, components, properties.
A scene might look something like this (example):
- Entity "Player"
    - Transform
        - Position
            - 0,0,0
        - Rotation
            - 0,0,0,0
        - Scale
            - 1,1,1
    - Script
        - Path
            - "Assets/Scripts/PlayerScript.as"
        - Properties
            - Health
                - 100
            - Speed
                - 10
- Entity "John Doe"
...
It contains all the entities with their components and properties.
Now let's say we have a prefab called ``"Ball.prefab"``. This might look something like this (same format as scene):
- Entity "Ball"
    - Transform
        - Position
            - 0,0,0
        - Rotation
            - 0,0,0,0
        - Scale
            - 1,1,1
    - Mesh
        - Path
            - "Assets/Models/Ball.obj"
        - Color
            - 1,0,0
It is the same as a scene file.
Now we want to use this prefab in our scene. The easiest thing to do would just be to put the prefab in the scene file. Like this:
- Entity "Player"
... (same as before, not important)
- Entity "John Doe"
...
- Entity "Ball"
    - Transform
        - Position
            - 0,0,0
        - Rotation
            - 0,0,0,0
        - Scale
            - 1,1,1
    - Mesh
        - Path
            - "Assets/Models/Ball.obj"
        - Color
            - 1,0,0
Now this would work... once. You have an exact copy of the prefab in your scene. But if you change the prefab, it won't change in the scene. This is not what we want. I like to call this a Blueprint (not to be confused with Unreal Engine Blueprints). This is a single time copy.
So what we want is a reference to the prefab. This is what we call a Prefab Instance. This is a reference to the prefab. So if you change the prefab, it changes in the scene. The scene file would look like this:
- Entity "Player"
... (same as before, not important)
- Entity "John Doe"
...
- Entity "Ball"
    - Prefab
        - Path
            - "Assets/Prefabs/Ball.prefab"
Notice how it doesn't have the actual components. It just has a reference to the prefab. So when loading the scene, we load the prefab and add it to the scene. This is a Prefab Instance. No matter how the prefab file looks, it will always be the same in the scene
This is where most people stop. While it's nice, it's still not a real prefab in my opinion.
What I wanted is to be able to change the prefab in the scene. So if you have a prefab instance in the scene, and being able to change properties of the prefab instance.
This way can customize the prefab specifically for a specific scene. For example, we want to change the scale of the prefab in the scene. The scene file would look something like this:
- Entity 1
...
- Entity 2
...
- Entity 3
    - Prefab
        - Path
            - "Assets/Prefabs/Ball.prefab"
        - Overrides
            - Transform
                - Scale
                    - 2,2,2
This way it still uses all the data from the prefab, but it overrides the scale. This way you can have a prefab in multiple scenes, but each scene can have its own customizability.
This is what I call real prefabs.
The Code
While the scene example I showed look simple, “Just get the overrides”. In reality, it’s quite complex. It requires to loop through every entity, every component, and every property of said component recursively. This is not something you want to do by hand. So I needed a way to do this automatically. Here comes my library Reflection Based Prefab system into play.
For every C++ object/component I needed these functions:
- Serialization
- Deserialization
- Compare
- Override
I’ll go through each of these functions and explain what they do.
Serialization / Deserialization
These speak for themselves. Being able to serialize a C++ object to a file and the other way around. For this I used:
<nlohmann/json>, for json serialization.<cbeck88/vis_struct>, for reflection.
See svh/serializer.hpp.
It uses the visit_struct library to loop through the struct. Additionally, I added the ability to implement custom serialize functions.
For example, this class:
struct MyStruct {
	int a = 0;
	float b = 0.0f;
	std::string c = "default";
};
I could either do this:
VISITABLE_STRUCT(MyStruct, a, b, c);Or implement a custom serialize function to allow for more control over the serialization:
static inline svh::json SerializeImpl(const MyStruct& s) {
	svh::json result = svh::json::object();
	result["a"] = svh::Serializer::Serialize(s.a); // int
	result["b"] = svh::Serializer::Serialize(s.b); // float
	result["c"] = svh::Serializer::Serialize(s.c); // string
	return result;
}

static inline void DeserializeImpl(const svh::json& j, MyStruct& s) {
	if (j.is_object()) {
		svh::Deserializer::FromJson(j["a"], s.a); // int
		svh::Deserializer::FromJson(j["b"], s.b); // float
		svh::Deserializer::FromJson(j["c"], s.c); // string
	}
}
This way the Serializer class will find
these functions at compile time and use that to serialize the struct.
This required me to use/learn template metaprogramming to "direct" the compiler to the right function. For example to detect if a class has a custom serialize function, I used the following code:
/* Serializer function detection */
template <typename T>
using serialize_fn = decltype(SerializeImpl(std::declval<const T&>()));

template <typename T>
constexpr bool has_serialize_v = is_detected<serialize_fn, T>::value;

template <typename T, typename R>
using enable_if_has_serialize = std::enable_if_t<has_serialize_v<T>, R>;
Additionally, I wanted to provide serialize/deserialize functions for all the STL types. This was quite a lot of work and I had to use a lot of template metaprogramming to get it to work. For example, to detect if a type is a vector, I used the following code:
/* Has std::begin/std::end */
template <class, class = void>
struct has_begin_end : std::false_type {};

template <class T>
struct has_begin_end<T, std::void_t<decltype(std::begin(std::declval<&>())), decltype(std::end(std::declval<&>()))>> : std::true_type {};

template <class T>
constexpr bool has_begin_end_v = has_begin_end<>::value;

template <class T, class R = void>
using enable_if_has_begin_end = std::enable_if_t<has_begin_end_v<>, R>;

/* Generic container for vector, array, set, unordered_set, multiset, unordered_multiset, deque, list, foward_list, initializer_lists */
template<class T>
static inline auto SerializeImpl(const T& c) -> svh::enable_if_has_begin_end<, svh::json> {
    svh::json result = svh::json::array();
    for (auto const& item : c) {
        result.push_back(svh::Serializer::ToJson(item));
    }
    return result;
}
See svh/std_types.hpp for the full list of STL types I implemented.
This was already a lot of work, but in hindsight, serialization/deserialization was the easy part...
Compare
In the scene examples I showed we have a list of overrides. This way each scene can have its own custom properties for the prefab.
To allow for this, we need a way to see what the difference is between the prefab and the prefab instance. This is where the compare function comes in.
For example, a transform component:
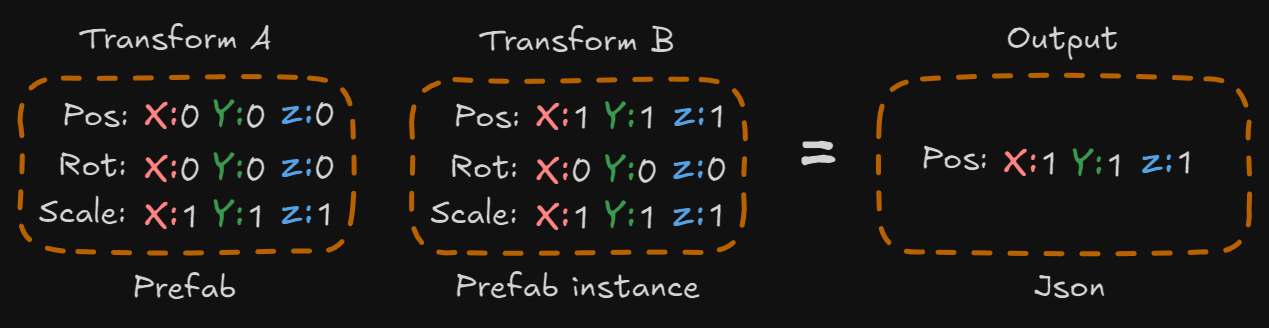
Transform component compare example
It checks all the properties, and returns a json object with the changes that happened to the right object.
Code-wise this is implemented the same way as serialization, but instead of serializing the object, it compares the properties and returns a json object with the changes:
Again, this uses reflection and template metaprogramming to detect if an object has any changes.
So for example, a transform component:
Transform A;
A.position = { 1.0f, 2.0f, 3.0f };
A.rotation = { 1.0f, 0.0f, 0.0f, 0.0f };
A.scale = { 1.0f, 1.0f, 1.0f };

Transform B;
B.position = { 4.0f, 5.0f, 6.0f };
B.rotation = { 1.0f, 0.0f, 0.0f, 0.0f }; // rotation unchanged
B.scale = { 11.0f, 12.0f, 13.0f };

svh::json changes = svh::Compare::GetChanges(A, B);
Would return:
{"position":[4.0,5.0,6.0],"scale":[11.0,12.0,13.0]}This way you can see what changed in the prefab instance. This is used to override the properties in the scene.
The hardest part was containers. If you have something like a vector, there are 3 modification you can do. Add, remove, and change. It would have to account for all of these. Some examples from my unit tests:
No changes:
std::vector<int> left{ 1,2,3 };
std::vector<int> right{ 1,2,3 };{}Add:
std::vector<int> left{ 1,2,3 };
std::vector<int> right{ 1,2,3,4 };{"added":[{"index":[3],"value":4}]}Remove:
std::vector<int> left{ 1,2,3,4 };
std::vector<int> right{ 1,2,3 };{"removed":[[3]]}Change:
std::vector<int> left{ 1,2,3 };
std::vector<int> right{ 4,5,6 };{"changed":[{"index":[0],"value":4},{"index":[1],"value":5},{"index":[2],"value":6}]}Now this looks all quite do-able. But what if you have a vector of vectors? Or a vector of structs with pairs that contain maps? You see where I'm going with this?
This can go out of hand really quickly. Luckily I found a library that does sequence comparisons for you: cubicdaiya/dtl.
You would provide 2 vectors, and a way of comparing the elements. This would then return the indices that got removed, added, and changed. For example:
template
struct CustomCompare {
    bool impl(const T& a, const T& b) const {
        auto changes = svh::Compare::GetChanges(a, b);
        return changes.empty();
    }
};

template
static inline svh::json CompareImpl(const std::vector& left, const std::vector& right) {
    // Use the custom comparator to compare elements
    dtl::Diff, CustomCompare> d(left, right, false, CustomCompare{});
    d.compose();
    auto ses = d.getSes();

    // ses now contains the changes like added, removed, and changed
    // ...
}
Override
The last function is the override function. It's basically the opposite of the compare function. It takes the changes from the compare function and applies them to the prefab instance.
Conclusion
The prefab system was a complex system that required a lot of work. It learned me a lot about template metaprogramming, reflection, and serialization.
This system is heavily used in the engine and is a crucial part of the workflow.
🏭 CI / CD
Problem:
- Designers and artists only know how to use Perforce.
- Get the engine executable to the designers, artists, and gameplay programmers.
- Compiling the engine yourself and uploading it to Perforce is cumbersome and time-consuming.
Solution:
Develop a Jenkins pipeline to automate the build process.
Now that we have actual people working inside the engine, there is bound to be bugs/oversights. We need a way to quickly fix these and prevent blocking the workflow of the designers and artists.
At first, we compiled the engine ourselves and uploaded it to Perforce. This was slow and took a way time from programmers. To solve this, I set up a Jenkins pipeline that triggers whenever we push code to the main branch. The pipeline gets the latest code, compiles the engine, and uploads the executable to Perforce.
This made it super simple and quick of us to develop/fix the engine. On average, the pipeline ran 5–6 times a day. If someone had to do this by hand, it would have taken a lot of time and effort every day.
DRY - "Don't Repeat Yourself"

Jenkins Pipeline visualization
👥 User Experience / Collaboration
A big part of my role was to improve user experience. Making sure the engine is intuitive, user-friendly, usable, and clear for the designers, artists and gameplay programmers. This meant I had to work closely with the designers and artists to understand their needs and how they work. Iterating on the engine/features based on their feedback and suggestions.
I appreciate when we have a feature request, you're good at asking further questions. Like “How do you want it”, “How should it work”. You're keeping us up to date and asking if this is how we want it.
Below are some of the features I implemented based on feedback from the designers and artists. While these features might be small, they make a big difference in the user experience and gave the designers and artists a better workflow.
Copy / Paste
Being able to copy/paste/duplicate is super nice to have. This gives users the ability to quickly duplicate entities in the scene without having to create them from scratch. This allows for faster iteration and prototyping.
I implemented so you can copy/paste almost anything. Inlcuding entities, components, properties, etc.
Click to enlarge
Drag & Drop
This was a feature that was requested by the designers. They wanted to be able to drag and drop assets from the asset browser into the scene. This is a common feature in many game engines, but it was missing in our engine.
I implemented this by sending a ray from the camera to the scene. If it hits something, it places the asset at that position, if it doesn't hit anything, it places the object at a certain distance that you can change by dragging the mouse up and down.
Undo / Redo
Being able to undo and redo actions in the editor is crucial for a good user experience. It allows users to quickly fix mistakes and try out different things without having to worry about losing their work.
Pressing Ctrl + Z will undo the last action, and pressing Ctrl + Y OR Ctrl + Shift + Z will redo the last undone action.
Click to enlarge
Read More
The undo/redo system is implemented using a command pattern. Each action in the editor is a command that can be undone or redone. This allows for a flexible and extensible system that can be easily extended with new commands.
The commands are stored in a stack, and when an action is performed, a new command is pushed onto the stack. When an undo action is performed, the last command is popped from the stack and its undo function is called. When a redo action is performed, the last undone command is pushed back onto the stack and its redo function is called.
template <typename T>
class DiffUtil : public IDiffOperation {
    public:
    DiffUtil() = default;

    void take_snapshot(T* value) {
        target = value;
        m_snapshot_before = JsonSerializer::serialize(*value);
    }

    void commit_changes(const std::string commit_message) {
        m_snapshot_after = JsonSerializer::serialize(*target);

        auto op = std::make_shared>(*this);
        Engine.undo_redo_manager().add_operation(op, commit_message);
    };

    virtual void undo() override {
        if (target) {
            JsonDeserializer::deserialize(m_snapshot_before, *target);
        }
    };

    virtual void redo() override {
        if (target) {
            JsonDeserializer::deserialize(m_snapshot_after, *target);
        }
    };

    private:
    svh::json m_snapshot_before;
    svh::json m_snapshot_after;
    T* target;
};
Then when the user makes a change in the editor, I Would call something like this:
Transform& t = Engine.ecs().registry.get<Transform>(entity); // get the transform of the entity
glm::vec3 translation(t.GetTranslation()); // get a copy of the translation
if (DragFloat3("Position", translation, 0.01f)) { // if the user changes the copy
    DiffUtil<Transform> diff_util;
    diff_util.take_snapshot(&t); // take a snapshot of the original transform

    t.SetTranslation(translation); // set the new translation

    diff_util.commit_changes("Set Translation"); // commit the changes
}
Click to enlarge
Pop-ups
Pop-ups are a great way to give feedback to the user. They can be used to show errors, warnings, or just information. I implemented a simple pop-up system that allows you to create pop-ups with a title, message, and buttons with actions.
See ▶ Read More for more information on how the pop-up system works.
Read More
The pop-up system uses a builder pattern to create pop-ups. You can set the title, message, buttons, and actions for each button. The pop-up will then be displayed on the screen.
When you create a pop-up it gets added to a queue. This makes sure that the pop-ups are displayed one after another. This way you can create multiple pop-ups without having to worry about them overlapping or being displayed at the same time.
PopUp::create()
    .title("Remove Component")
    .message("Removing a component on a prefab is not possible.")
    .option("OK");

PopUp::create()
    .title("Question")
    .message("Did you like the previous pop-up?")
    .has_close(false) // Don't show the X in the top right corner
    .option("Yes")
    .option("Maybe")
    .option("No", []() {
        // Do something
        Engine.window().request_close(); // Close the engine :)
    });
🗂️ Open Source
We decided to open source the game. This meant everybody had access to the engine, tools, source code, and assets. Allowing anyone to modify the game. They could:
- 🌄 Create New Levels - Design fresh maps, puzzles, and challenges, or modify existing ones to enhance gameplay.
- 🛠 Change the code - Implement new features, rewrite mechanics, or make a whole new gamemode.
- ✨ Customize Assets - Replace models, swap colors, or give the whole level a new aesthetic.
Seeing my team use the engine & tools I created has been a great learning opportunity for me. It teached me a lot about user experience, usability, and how to make an engine that is intuitive and easy to use. Open sourcing the game + engine will allow me to continue to learn and improve the engine based on feedback from players.
Read more about the engine release in this blogpost I wrote on itch.io.
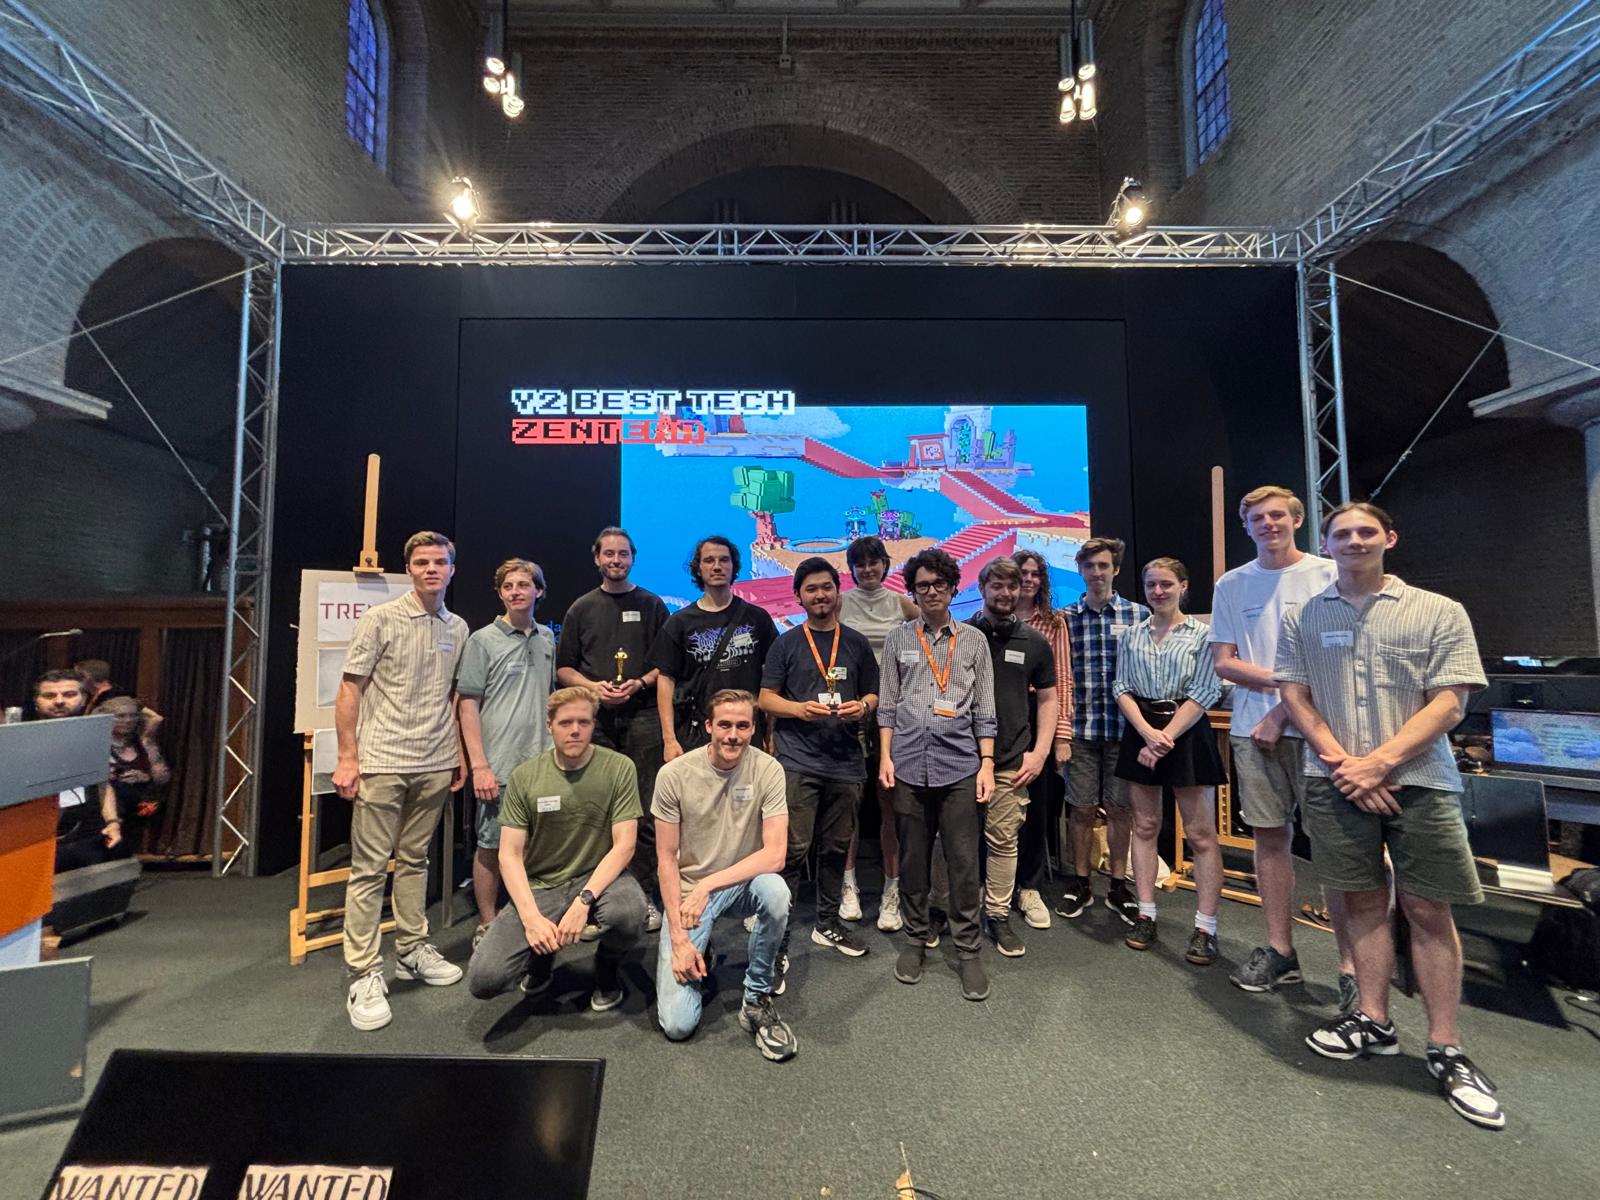
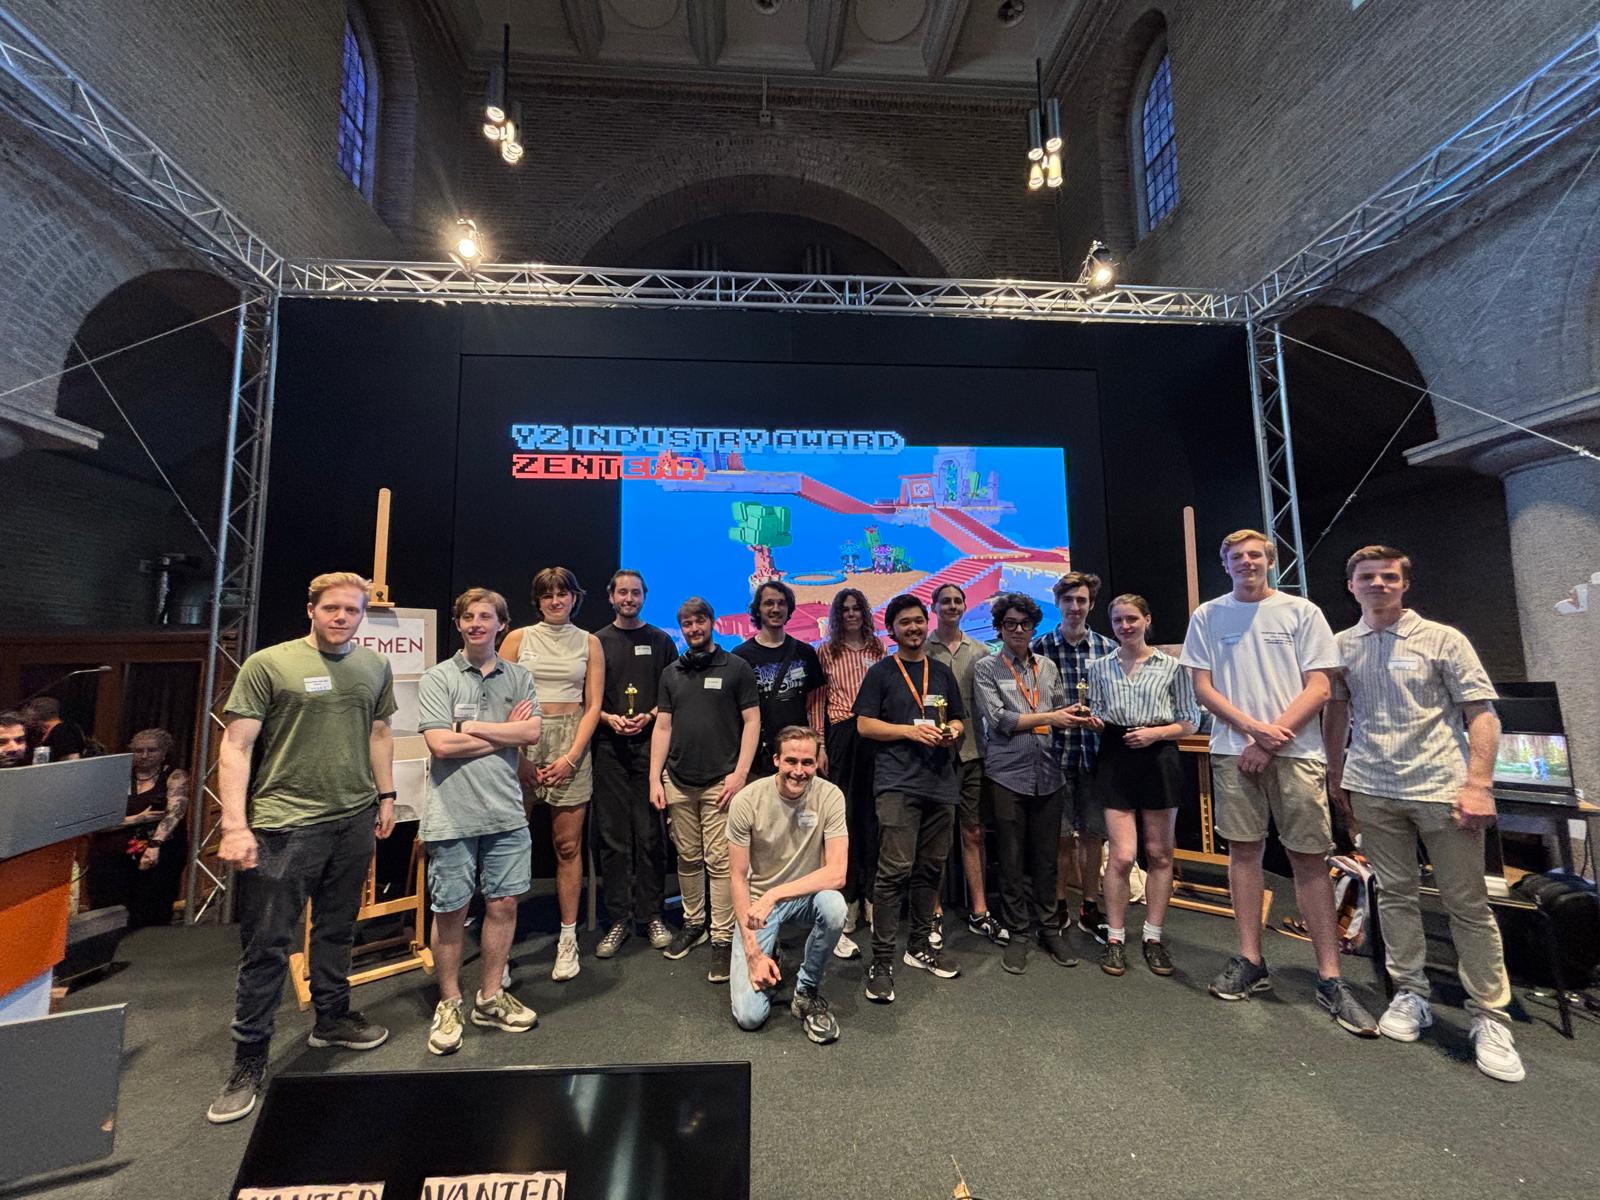
🏆 Awards!
At the end of the year, we had an industry day. This day people from the industry came to see all projects/games build by students this year. We had a booth where we showed the game running on PS5 and engine showcase.
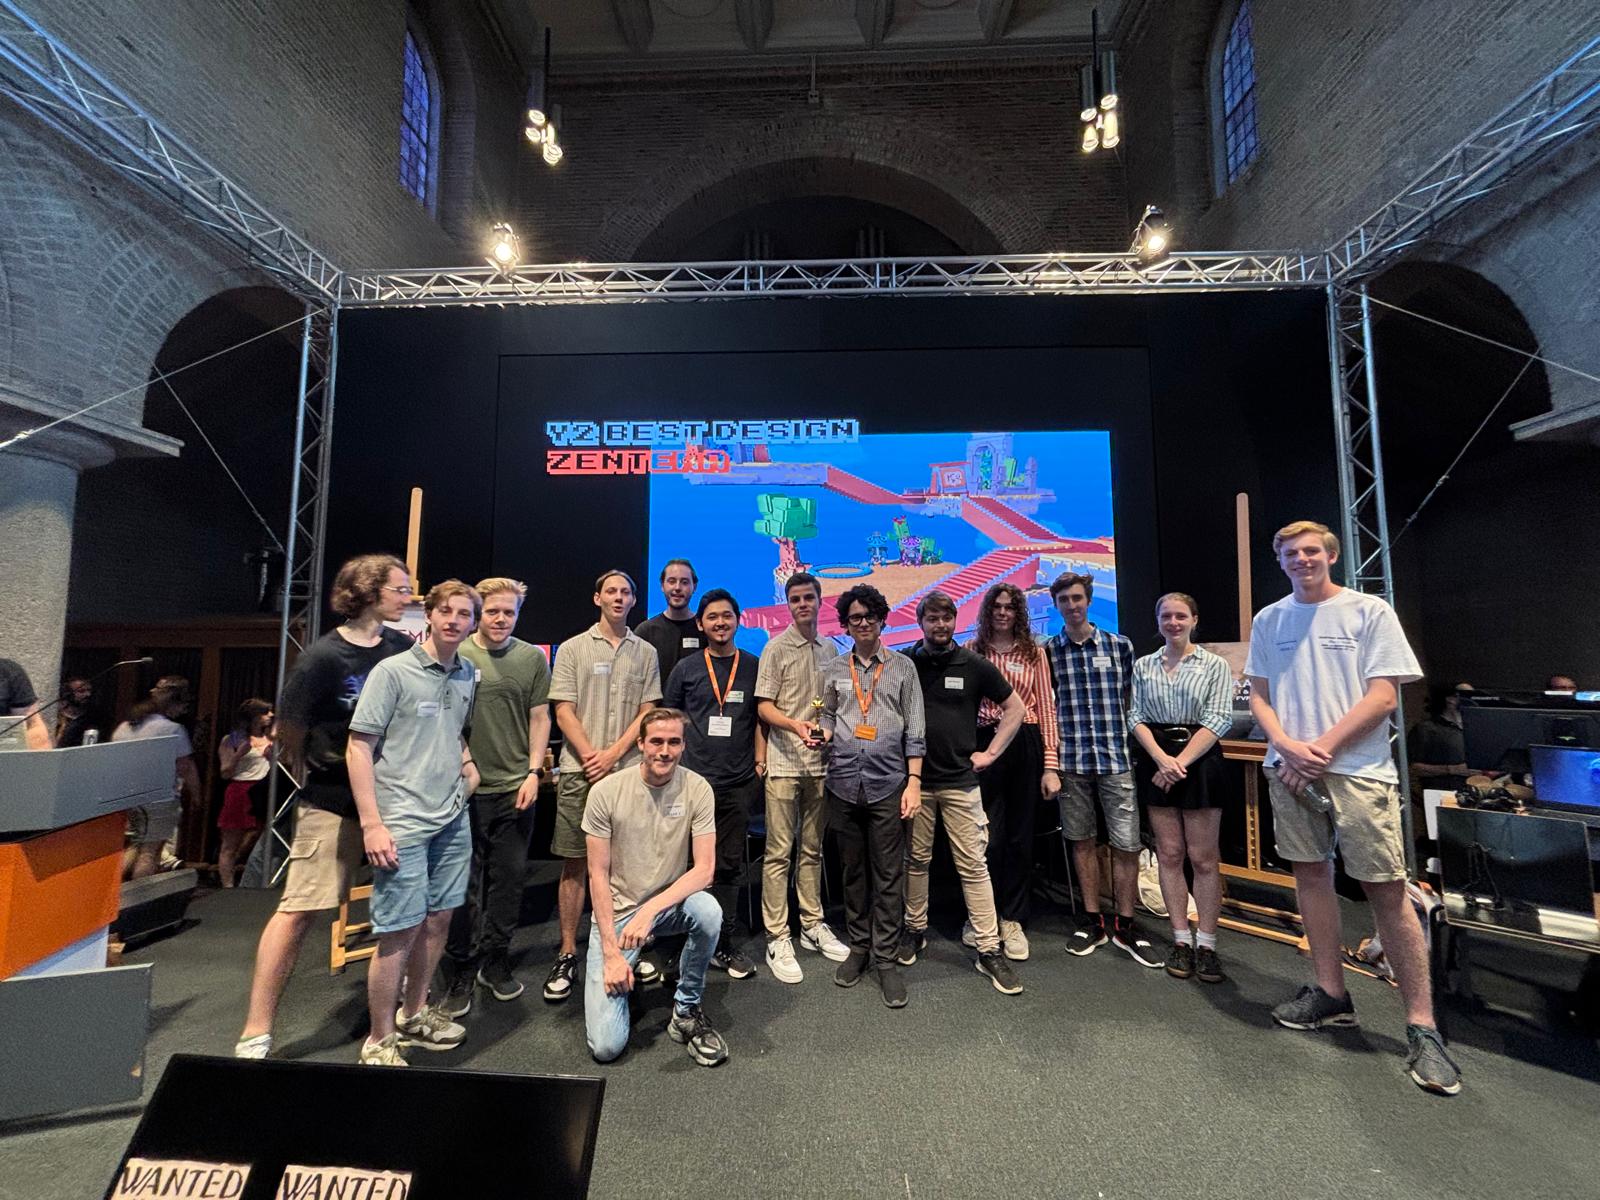
At the end of the day, we had an award ceremony. Our team won 3 out of 4 Awards from our year!
- 💾 Best Tech - Most technically impressive project.
- 🎮 Best Design - For the design of the puzzles and the game mechanics.
- 🏆 Industry Award - Best project voted by people from the industry.
💾 Best Tech
🎮 Best Design
🏆 Industry Award
🖥 Downloads
The game + the engine is available to download on itch.io.
Additionally, I released a tech-demo that showcases the engine and some of its features. It has Chess and some cool destruction!